


Many drivers change their tires themselves – whether it's a seasonal change between summer and winter tires or because a flat tire needs replacing. With the right approach, it's not rocket science. This guide will show you step-by-step how to change a tire successfully – including practical tips and important safety information.
-
Preparation – half the battle
The right location is crucial: Choose a firm, level surface. A sloping hill or unpaved path is unsuitable, as the car could slip. A dry garage floor or a stable parking space is ideal.
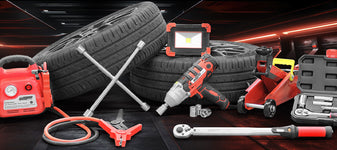
Necessary tools: jack, wheel wrench or wheel nut wrench, torque wrench (especially important for aluminum rims), work gloves.
Secure the vehicle: Apply the handbrake, engage first gear (or park if automatic) and block the wheels that remain on the ground with chocks or wooden blocks.
-
Loosen wheel bolts
Always loosen the wheel bolts while the car is still on the ground—otherwise, the wheel will turn. Half a turn is sufficient.
If your car has a wheel lock, remember to bring the special key with you. -
Jack up the car
Only place the jack at the points specified in the manual—usually directly behind the front wheels or in front of the rear wheels on the sill. If placed incorrectly, you risk damaging the vehicle or causing it to slip.
Raise the car so that the wheel hangs freely in the air and can turn easily. -
Remove the wheel
Unscrew the screws completely and place them in a bowl so nothing gets lost.
Pull the wheel straight off. If it's stuck, give it a gentle kick on the inside of the tire—make sure you have a firm footing. -
Mounting a new wheel
Check the hub's bearing surface: It should be clean and free of rust. If necessary, carefully clean it with a wire brush. A light dusting of copper paste on the thread (not on the bearing surface!) will make it easier to remove later.
Also pay attention to the tire's direction of rotation (arrow marking on the sidewall). Place the wheel straight on the wheel and tighten the bolts by hand first.
-
Tighten screws correctly
Tighten the screws crosswise to ensure the wheel sits evenly. Tighten only slightly at first until the wheel is seated.
Once the car is back on the ground, finally tighten the bolts to the specified torque. You can find the exact value in your vehicle's manual. A torque wrench is a must: Bolts that are too loose can come loose, while those that are too tight can damage the threads.
-
After the change
-
Check tire pressure and adjust if necessary
-
After 50–100 km, tighten the wheel bolts with a torque wrench
-
Mark removed tires (“VL” for front left, “HR” for rear right) so that you know where they were mounted the next time you change them – this way they can be rotated better and wear more evenly
-
Avoid typical mistakes
-
No lubricant between the wheel and the rim – otherwise the wheel may come loose while driving.
-
Store removed tires properly: in a cool, dry, and dark place, preferably lying down or on special rim holders.
Changing a tire isn't a complicated workshop job, but with a little practice, it's a safe routine. Careful preparation, correct work, and strict adherence to safety rules are crucial.
If you tighten screws with the correct torque, pay attention to the direction of rotation and check the tires regularly, you will be safe on the road.
And if you are unsure, a specialist workshop is always the right place – because safety comes before speed.
Discover our top deal now: the ADAC torque wrench from Brüder Mannesmann.

